How to Build a Beautiful and Practical macOS Terminal
The terminal is an essential tool for development, but the default macOS terminal is rather plain in both appearance and functionality. This article will guide you on how to use tools like iTerm2, Oh My Zsh, and Powerlevel10k to create a beautiful and practical macOS terminal. Before we begin, let’s take a look at the final result.
Before proceeding, it is recommended to back up your existing configurations.
1 | |
iTerm2
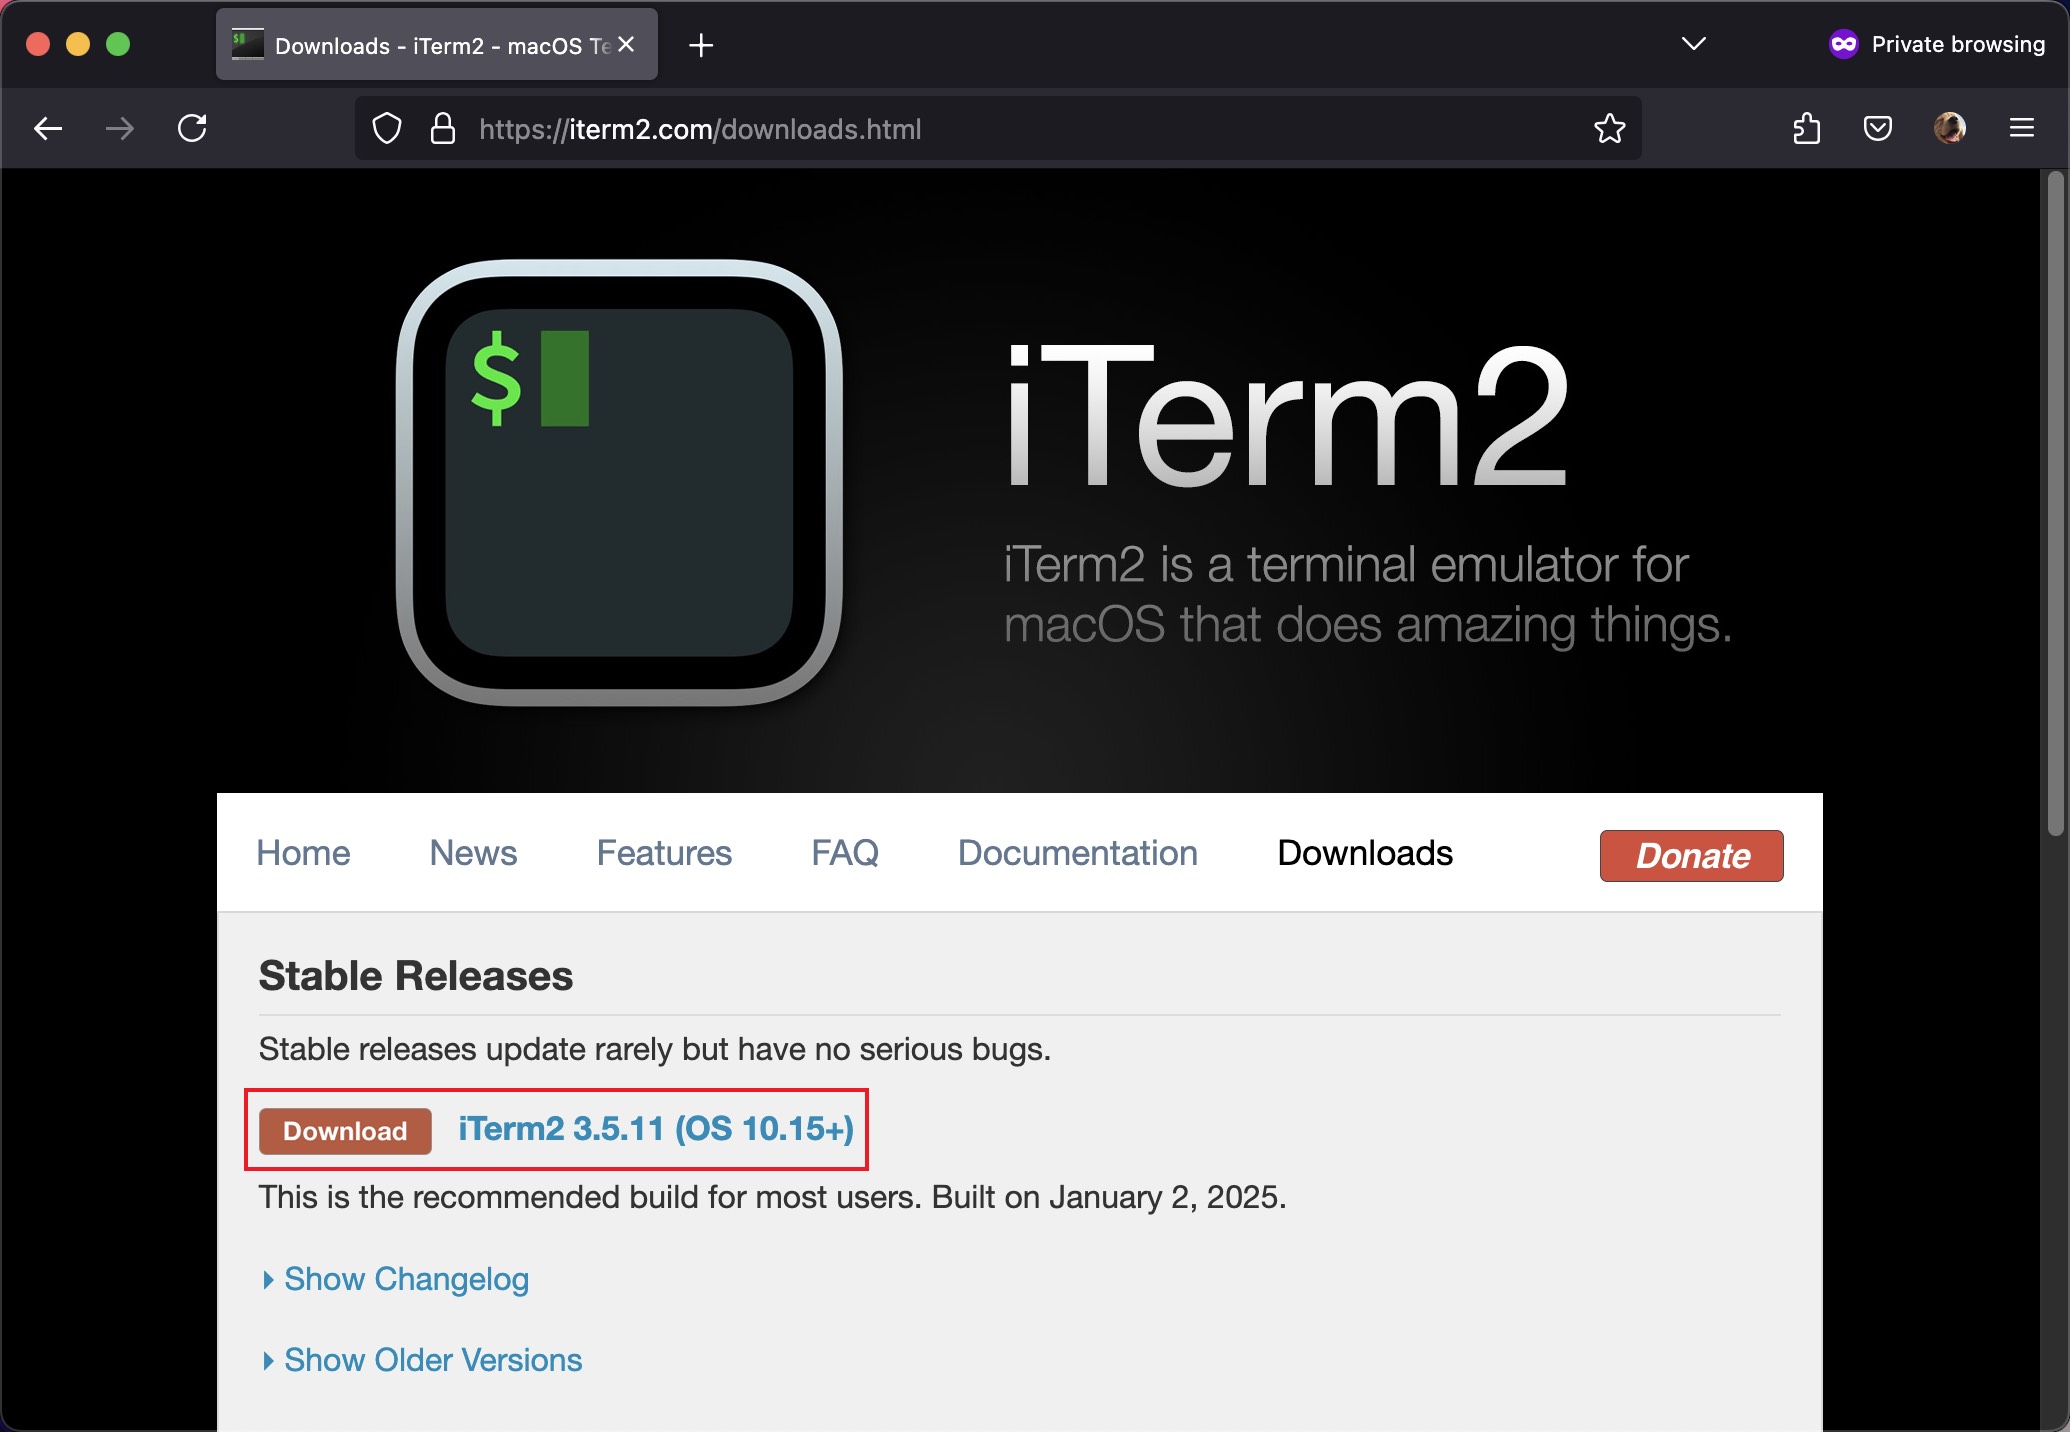
iTerm2 is a replacement for the macOS terminal with more features. First, we need to download the latest version from https://iterm2.com/downloads.html.
Next, extract the downloaded zip file and drag the resulting iTerm file to the “Applications” folder.

Open iTerm2, and in the menu bar, click iTerm2 -> Settings... to enter the settings page.
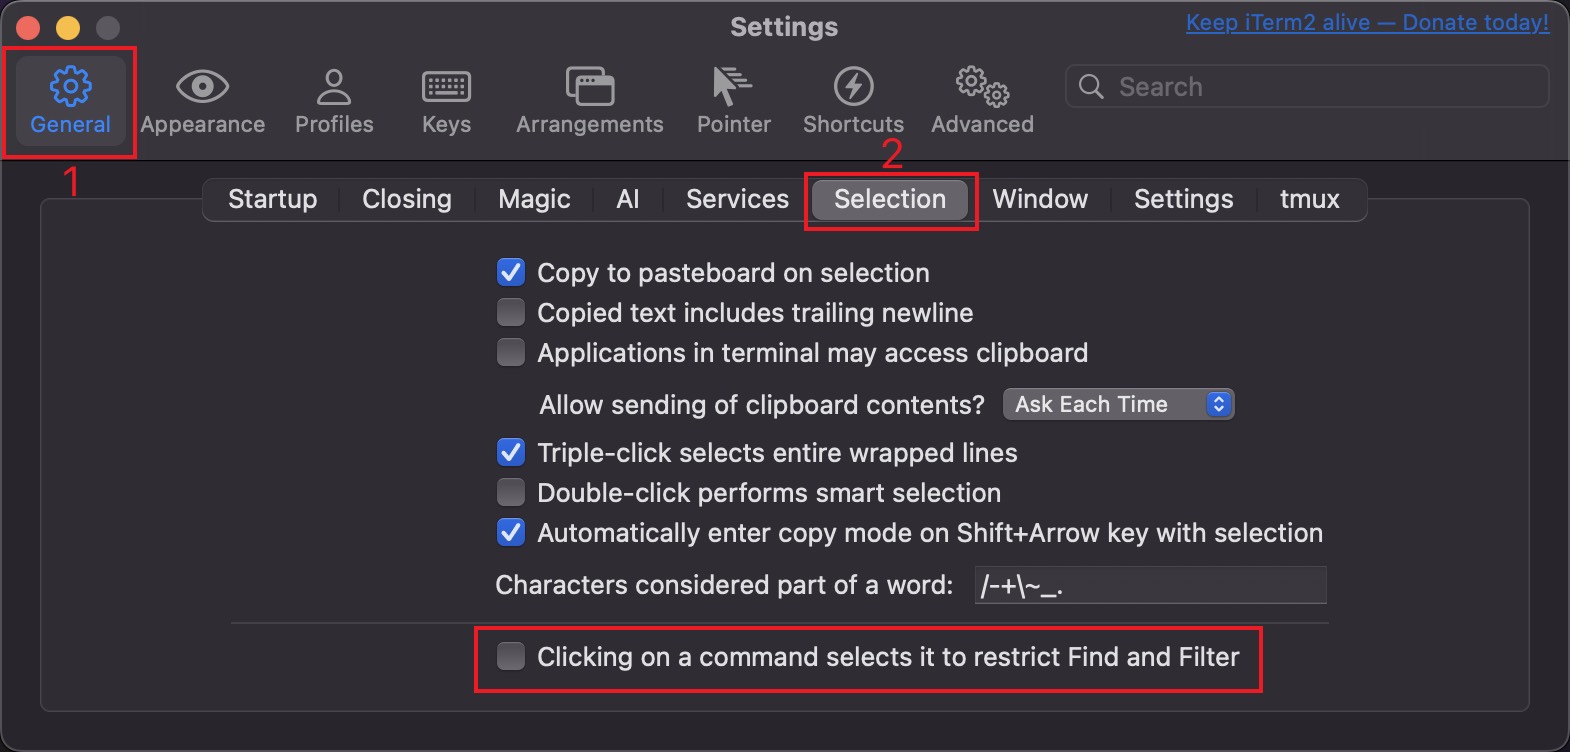
First, go to the General -> Selection tab and modify the settings as shown in the image below.
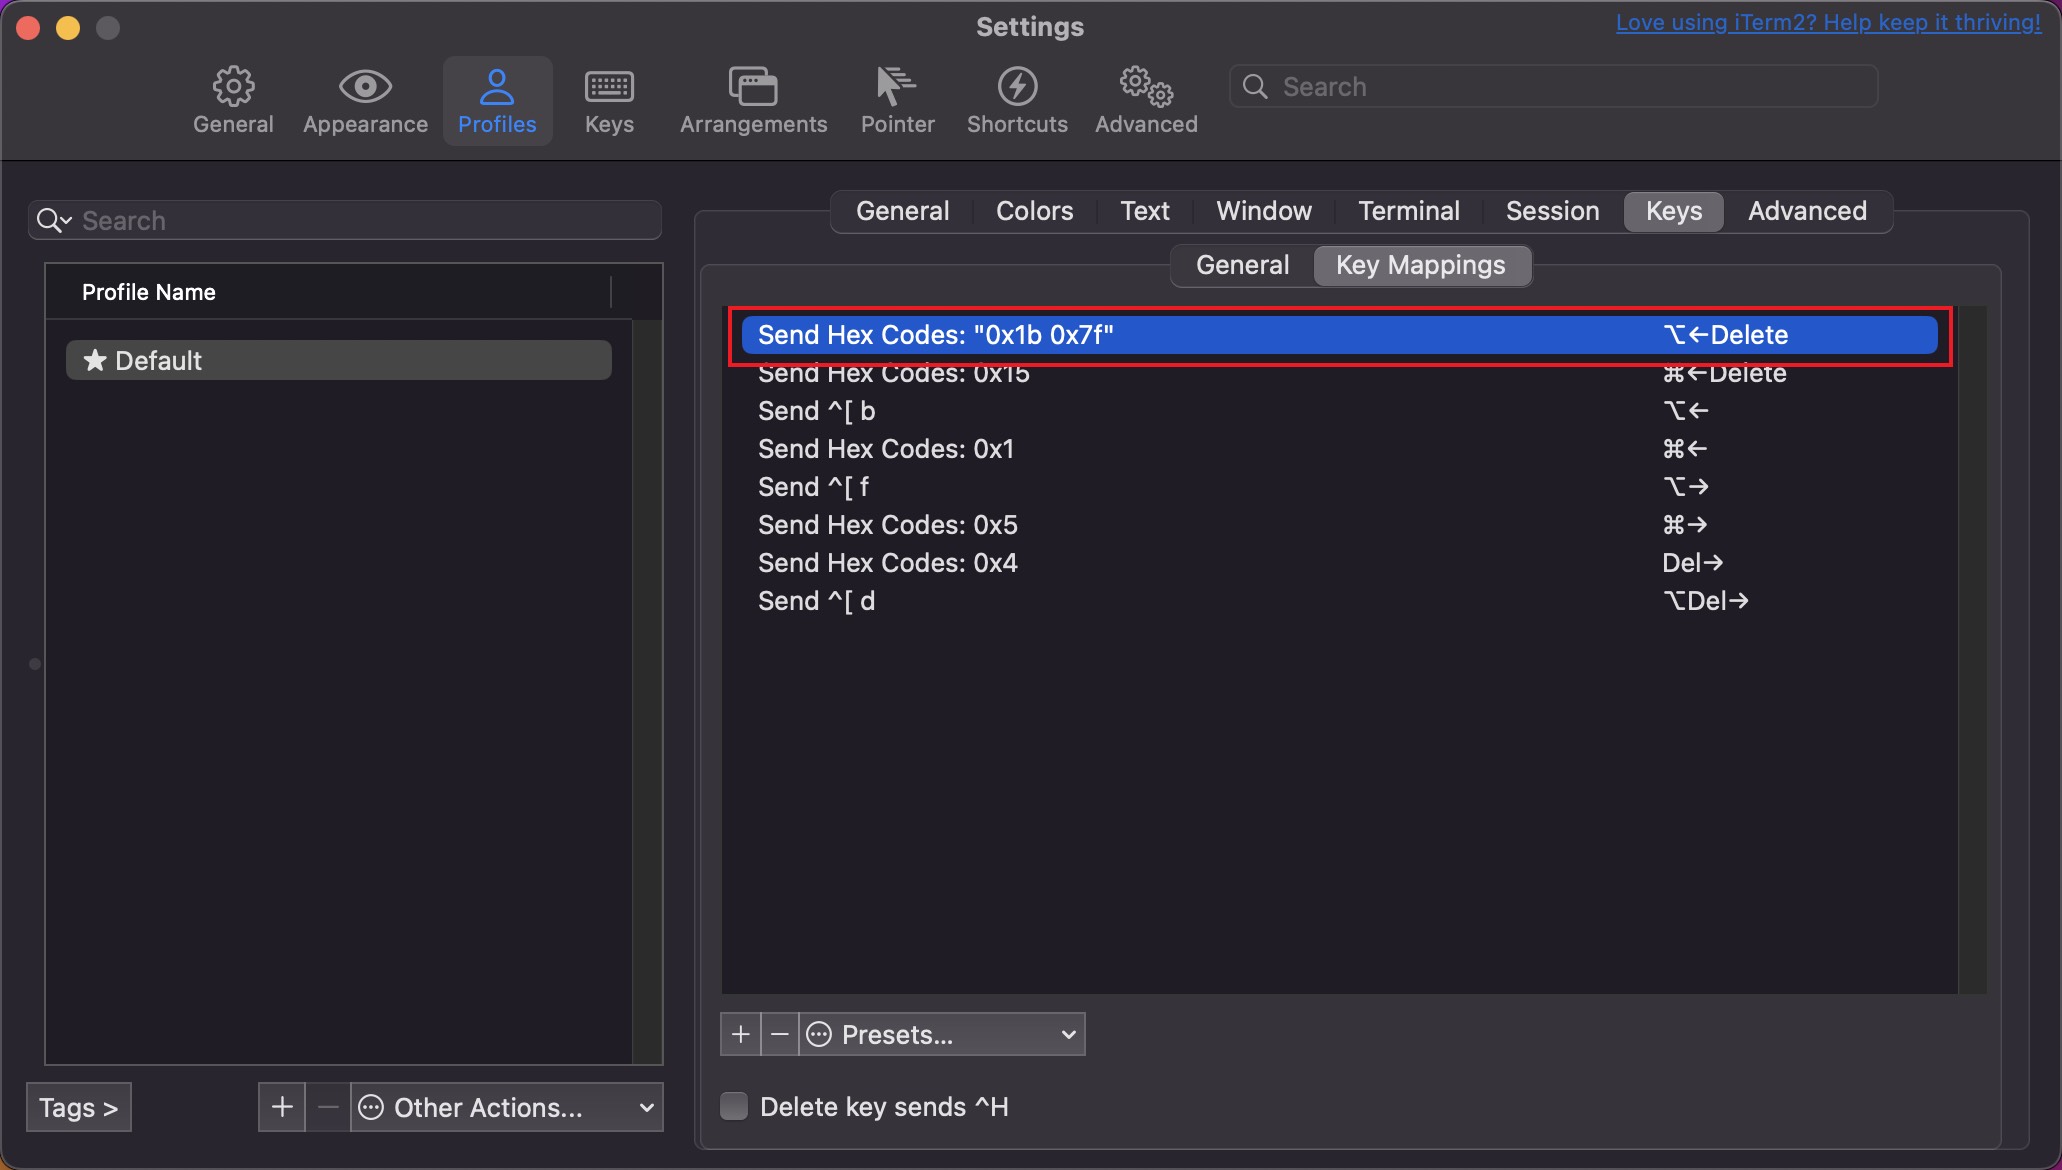
Then, go to the Profiles -> Keys -> Key Mappings tab, click Presets... -> Natural Text Editing.
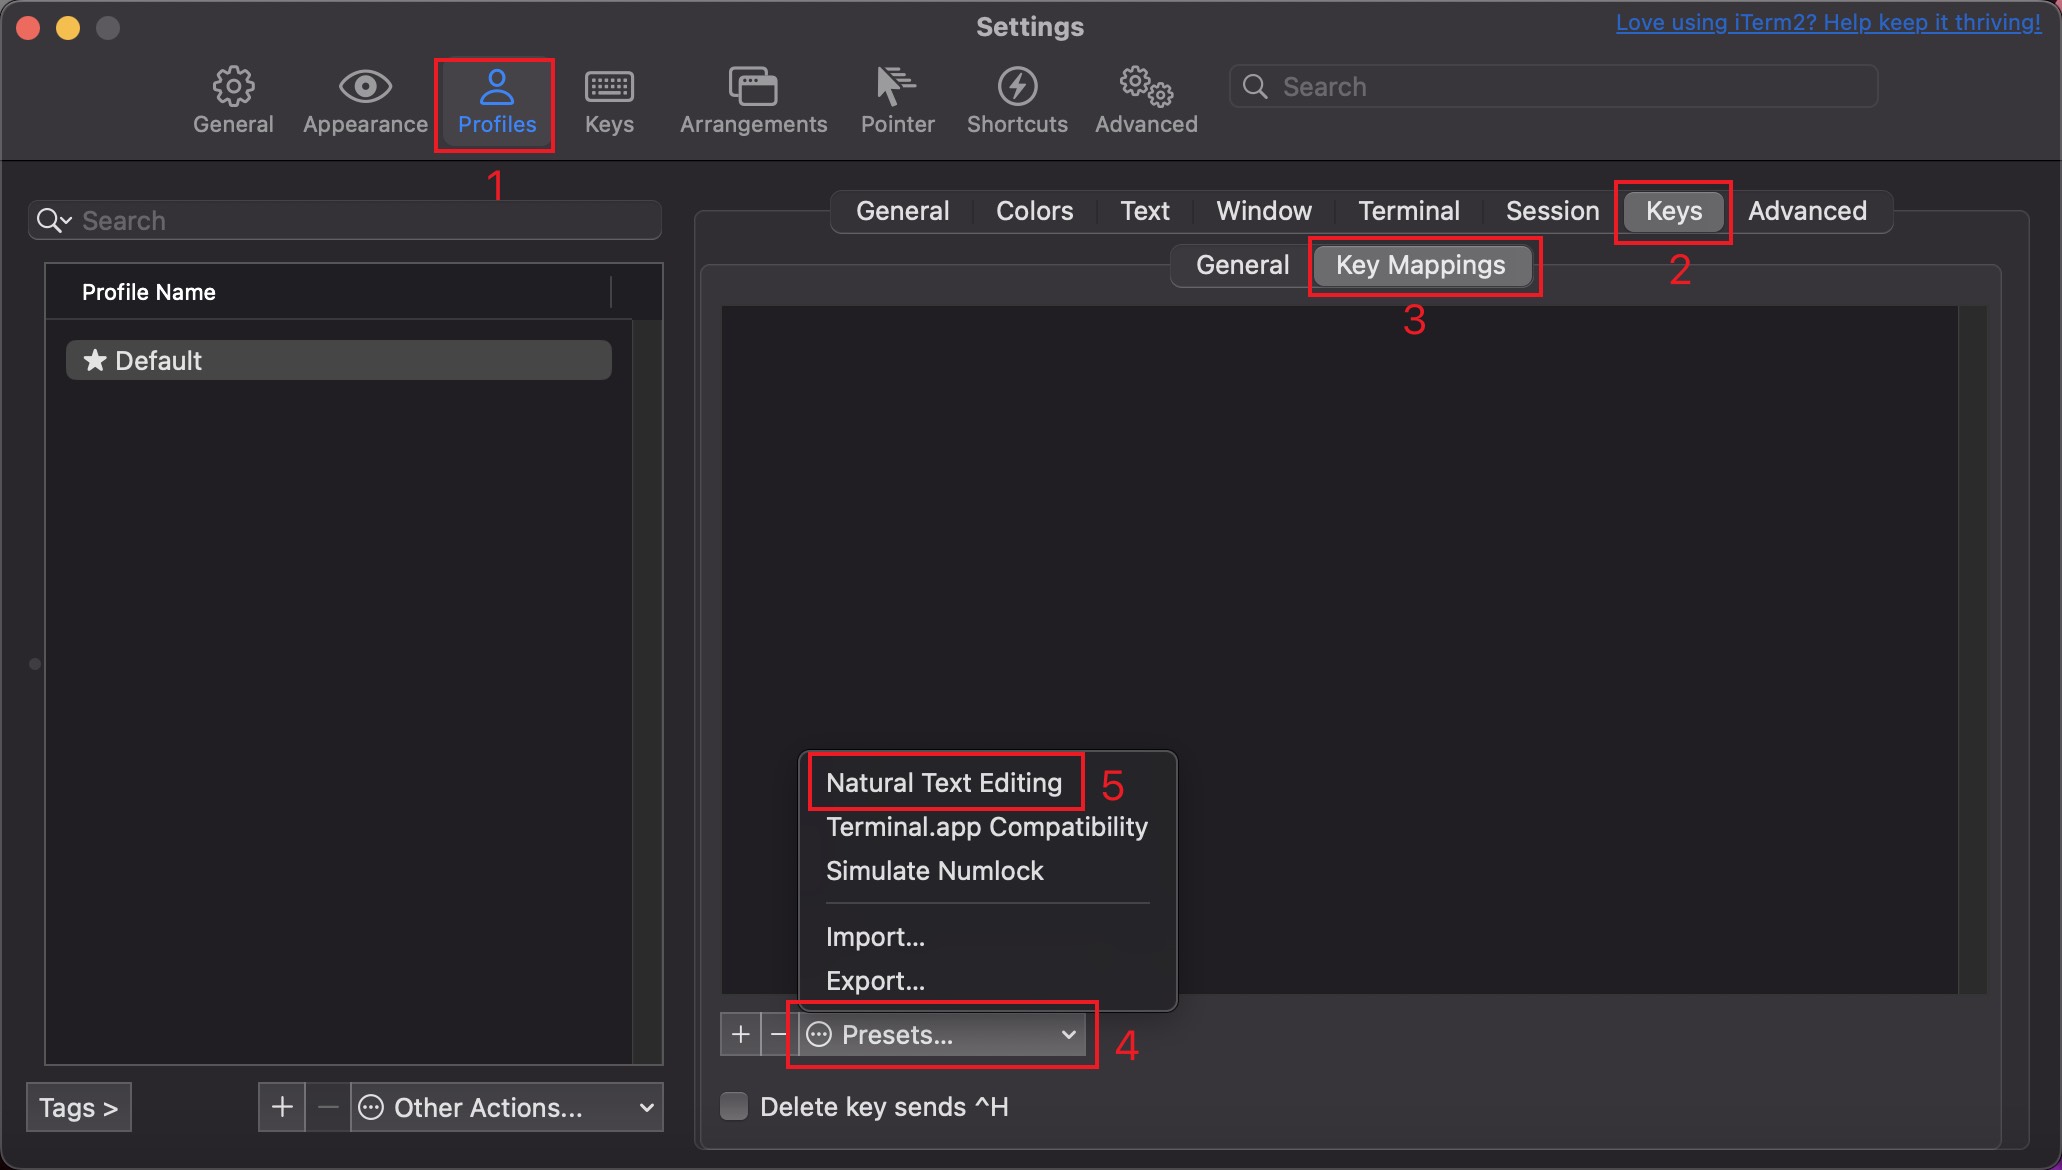
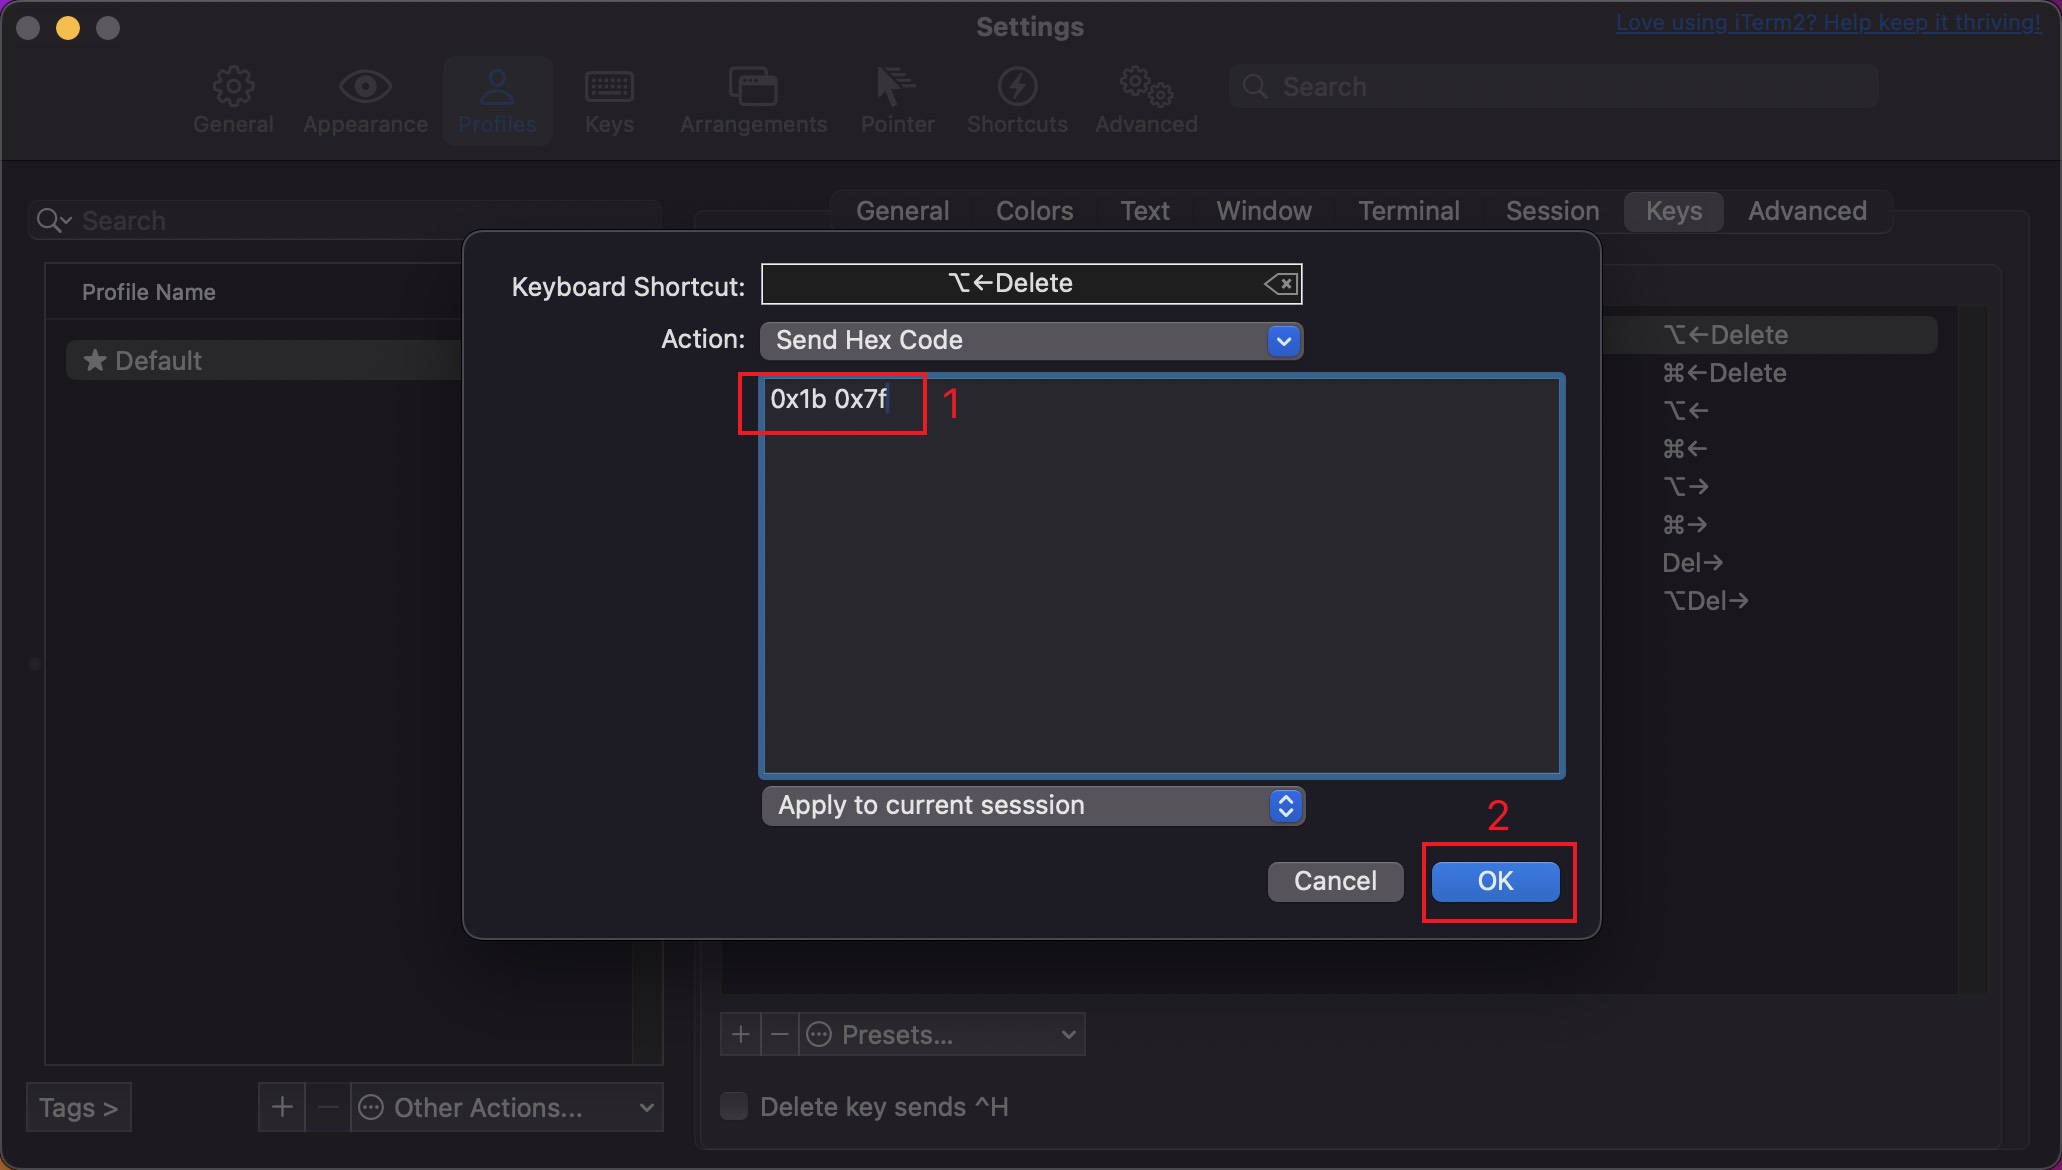
However, as of the time of writing this article, the Natural Text Editing preset in iTerm2 has an issue where ⌥ Option + ⌫ Backspace cannot delete a word. To fix this, we need to double-click to edit the key mapping for ⌥←Delete, removing the double quotes in the Hex Code, as shown below.
Some of these key mappings are natively supported by Zsh, while others need to be used in conjunction with the bindkey command in the ~/.zshrc configuration file. We will cover how to configure this later.
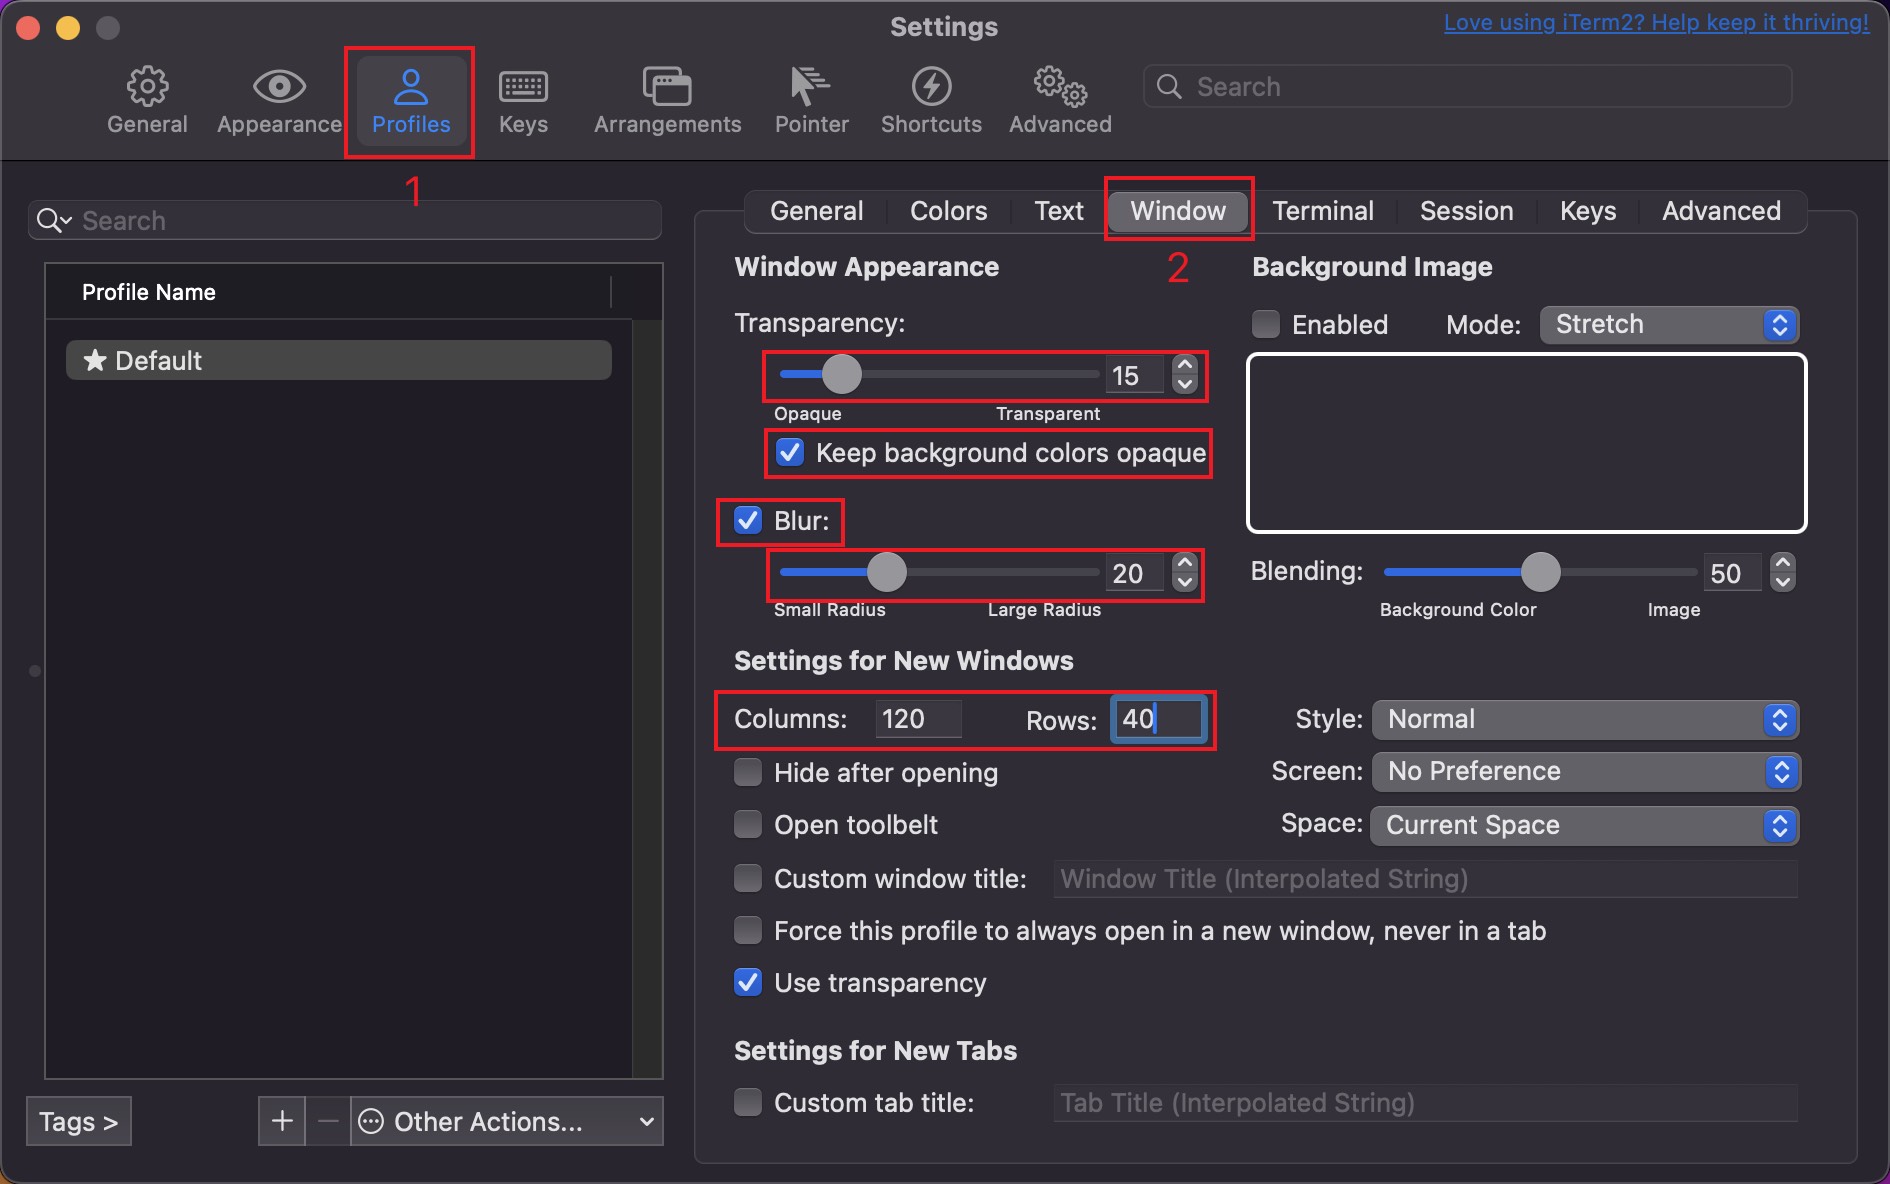
Next, go to the Profiles -> Window tab and modify the settings as shown in the image below. Note that if you don’t like the translucent effect, you only need to set Columns and Rows.
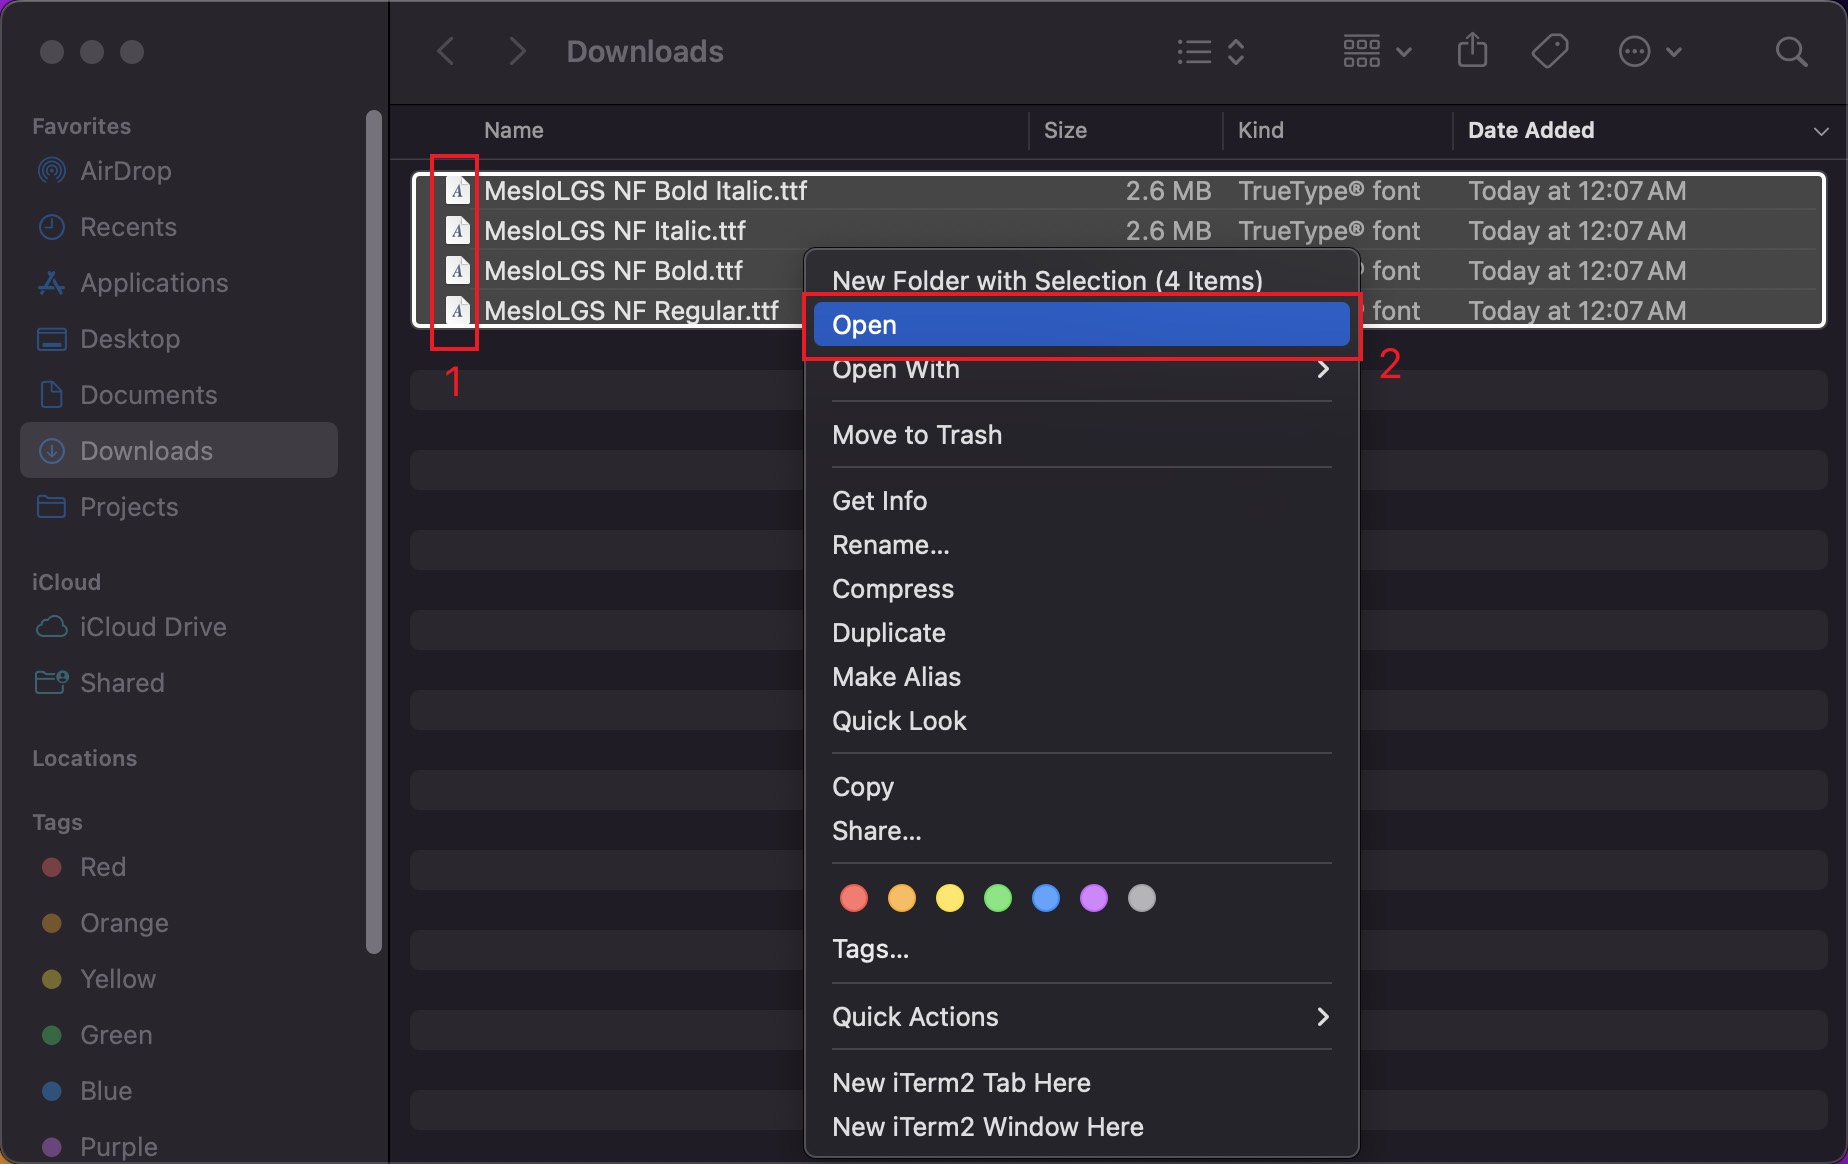
Before proceeding, we need to install the Meslo Nerd Font. Download the following font files:
Go to the download folder, select all the font files, right-click, choose “Open,” and then click “Install.”

Now, go back to the iTerm2 settings page, enter the Profiles -> Text tab, and modify the settings as shown in the image below.
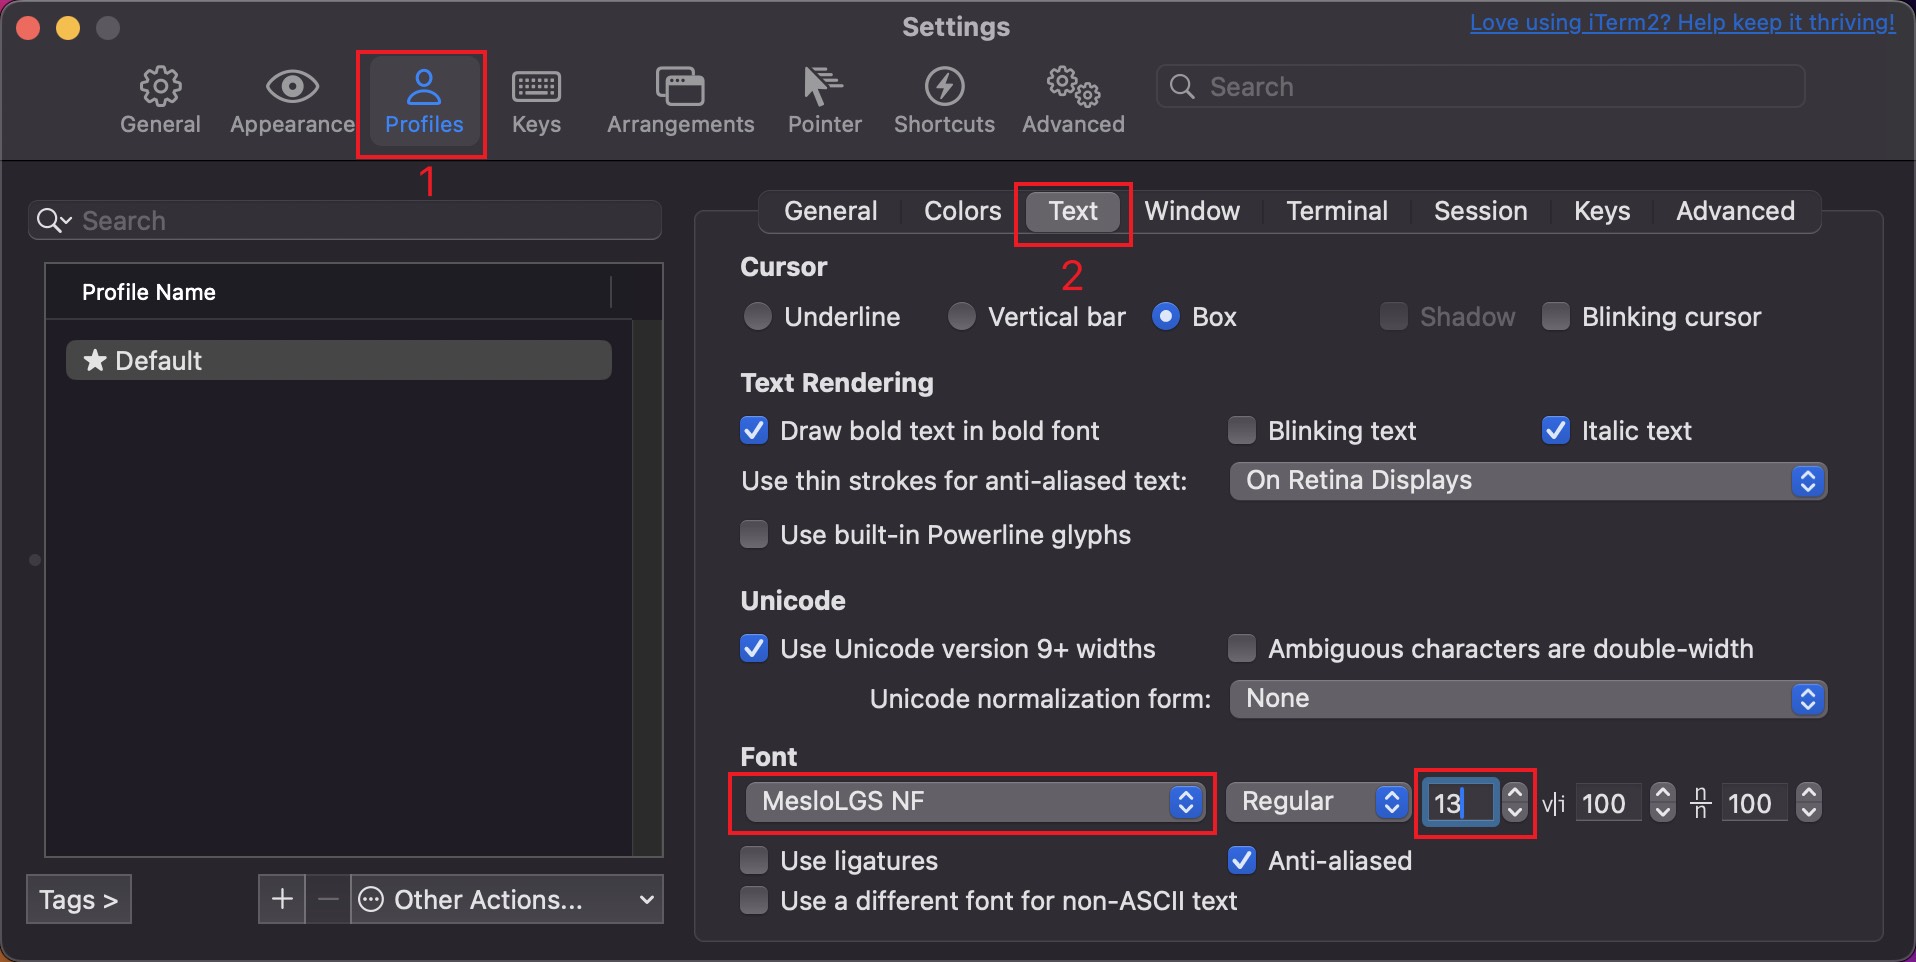
The Powerlevel10k theme, which we will install later, requires these fonts to display correctly.
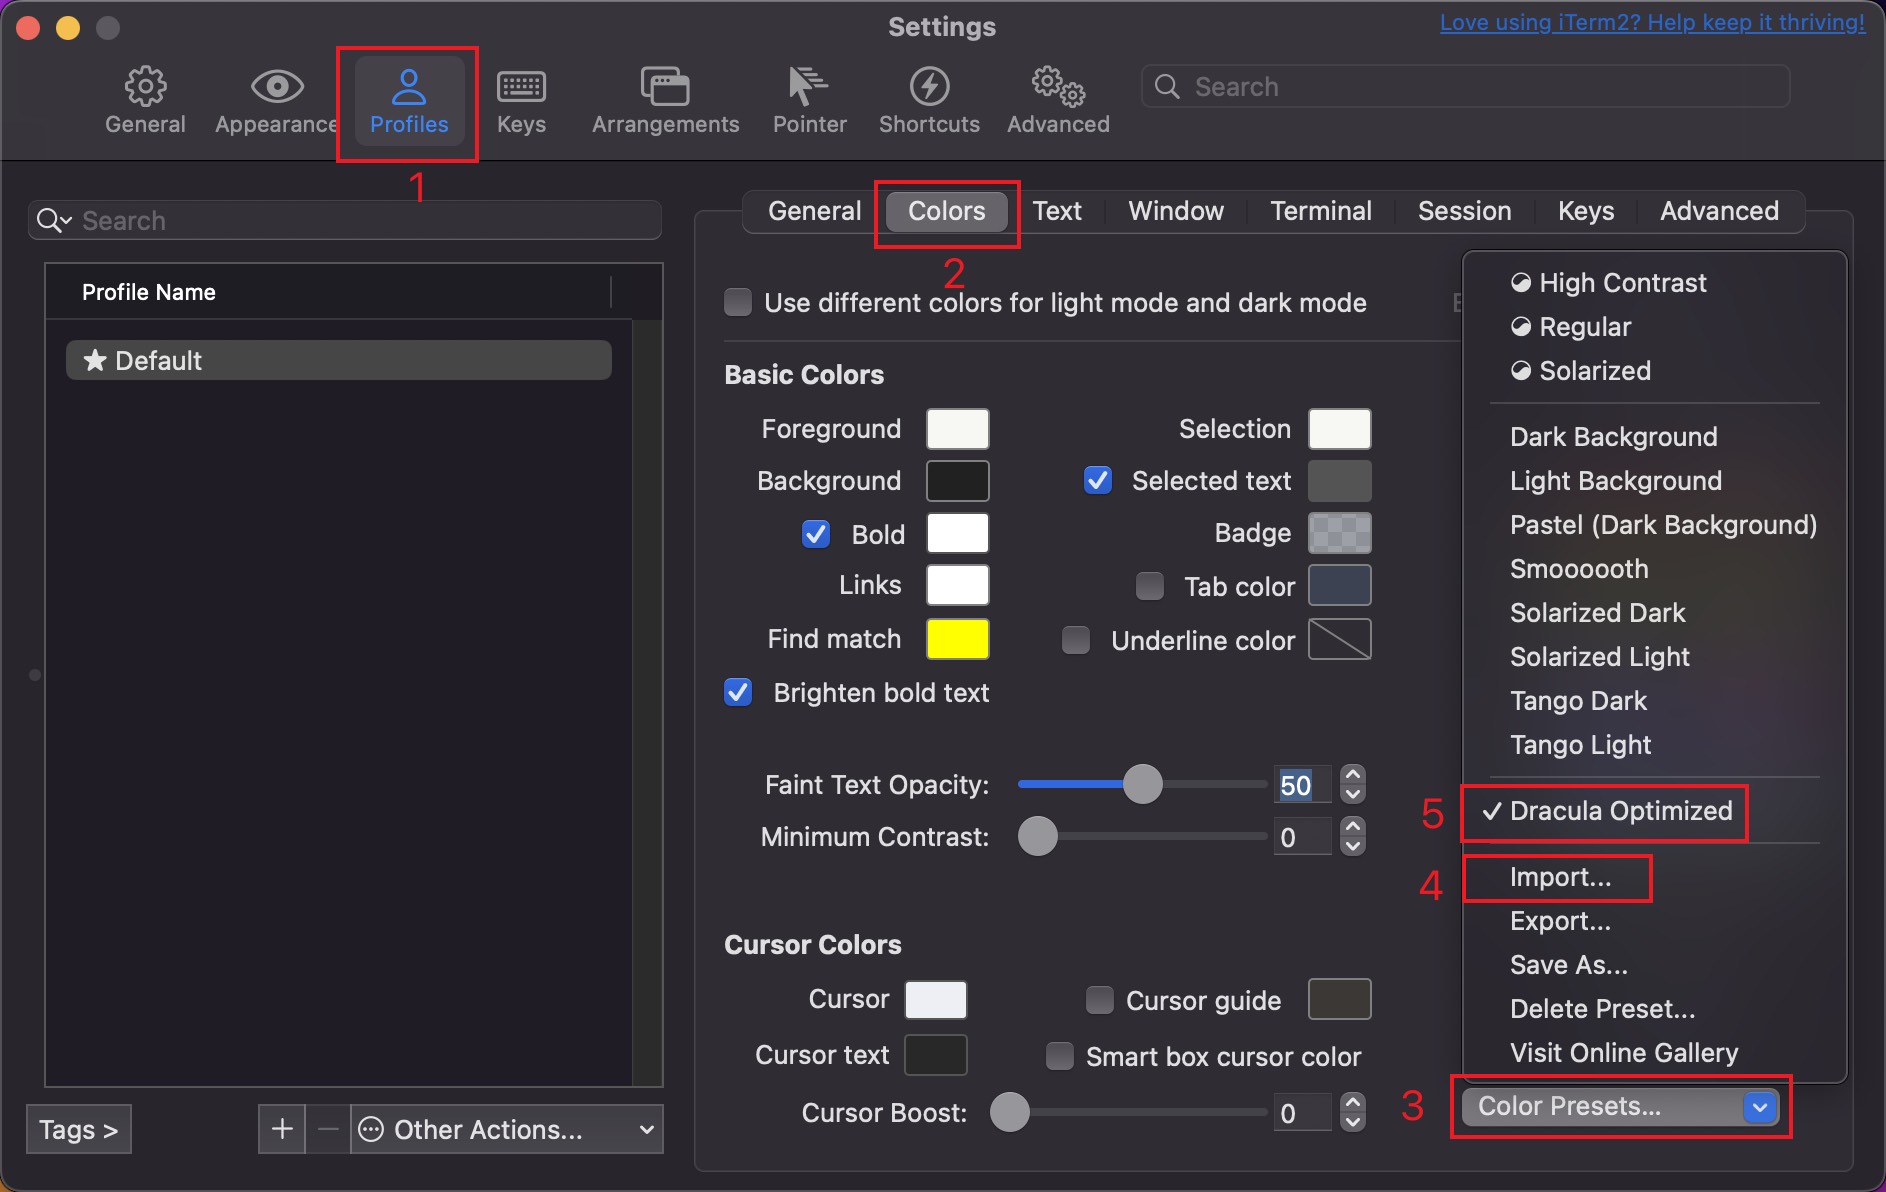
Before the final step, we need to prepare a color scheme. You can go to https://iterm2colorschemes.com/ to download your favorite color scheme, or use my color scheme (right-click the link in your browser and choose “Save As”).
Now, go back to the iTerm2 settings page, enter the Profiles -> Colors tab, click Color Presets... -> Import..., select the color scheme you just downloaded, and then click Color Presets... again to select the imported color scheme.
Customizing Vim
If you don’t use Vim, you can skip this step.
As the saying goes, “A craftsman must sharpen his tools to do his work well.” In the following steps, we will frequently use the Vim editor to modify various configuration files, so we need to make some improvements to Vim. We will use the following tools:
- Vundle (plugin manager)
- gruvbox (color scheme)
- vim-airline and vim-airline-themes (status bar plugins)
First, we need to run the following command in the terminal to download Vundle:
1 | |
Next, we need to create the ~/.vimrc file and enter the following content to enable Vundle and let it install various plugins:
1 | |
1 | |
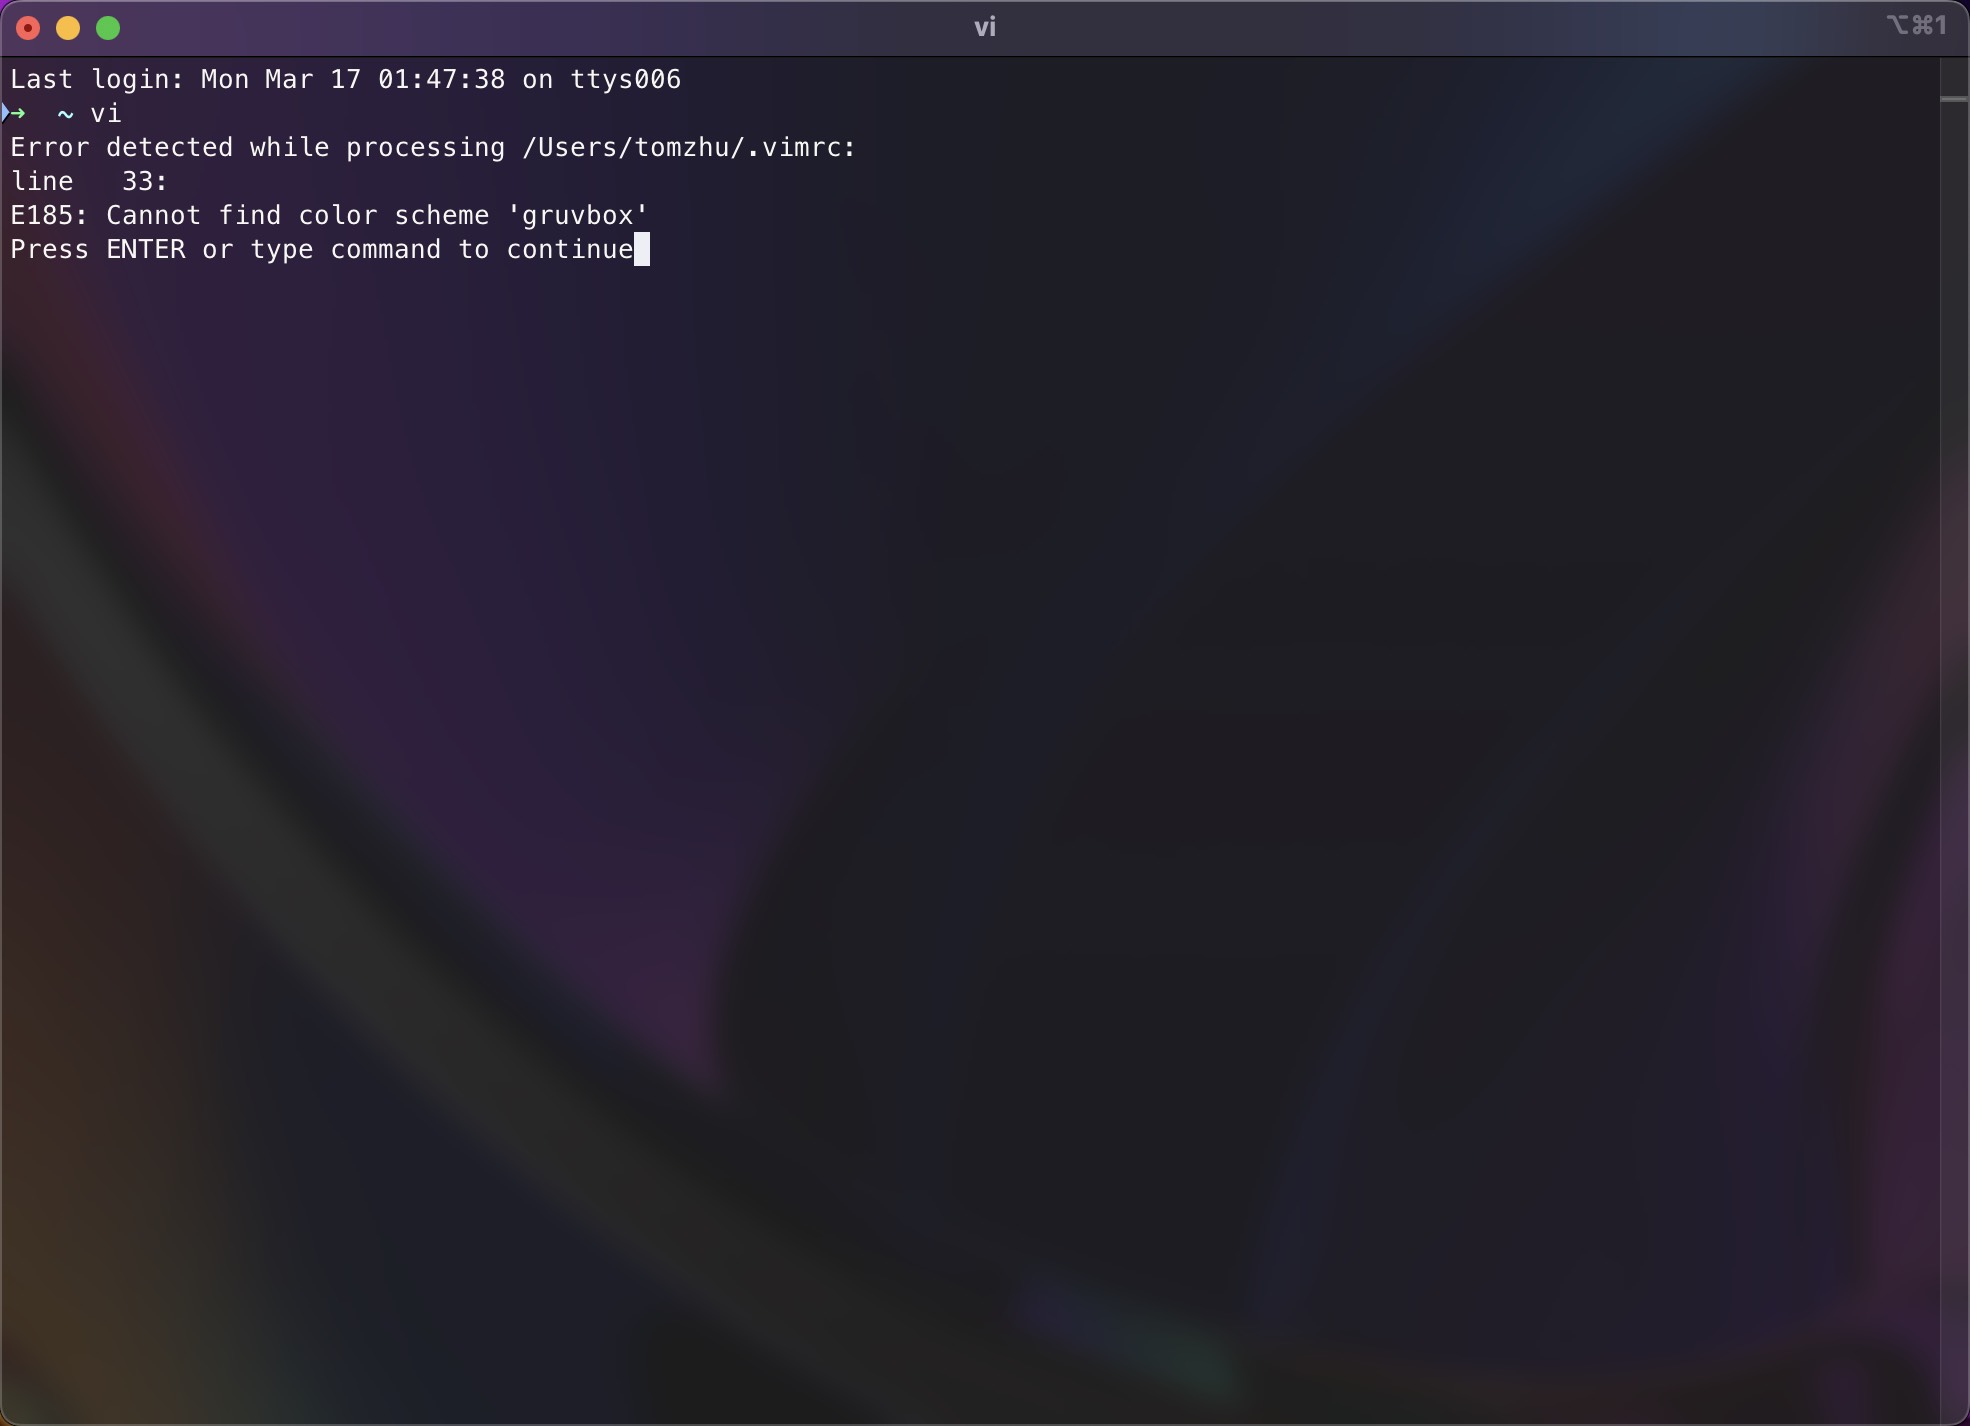
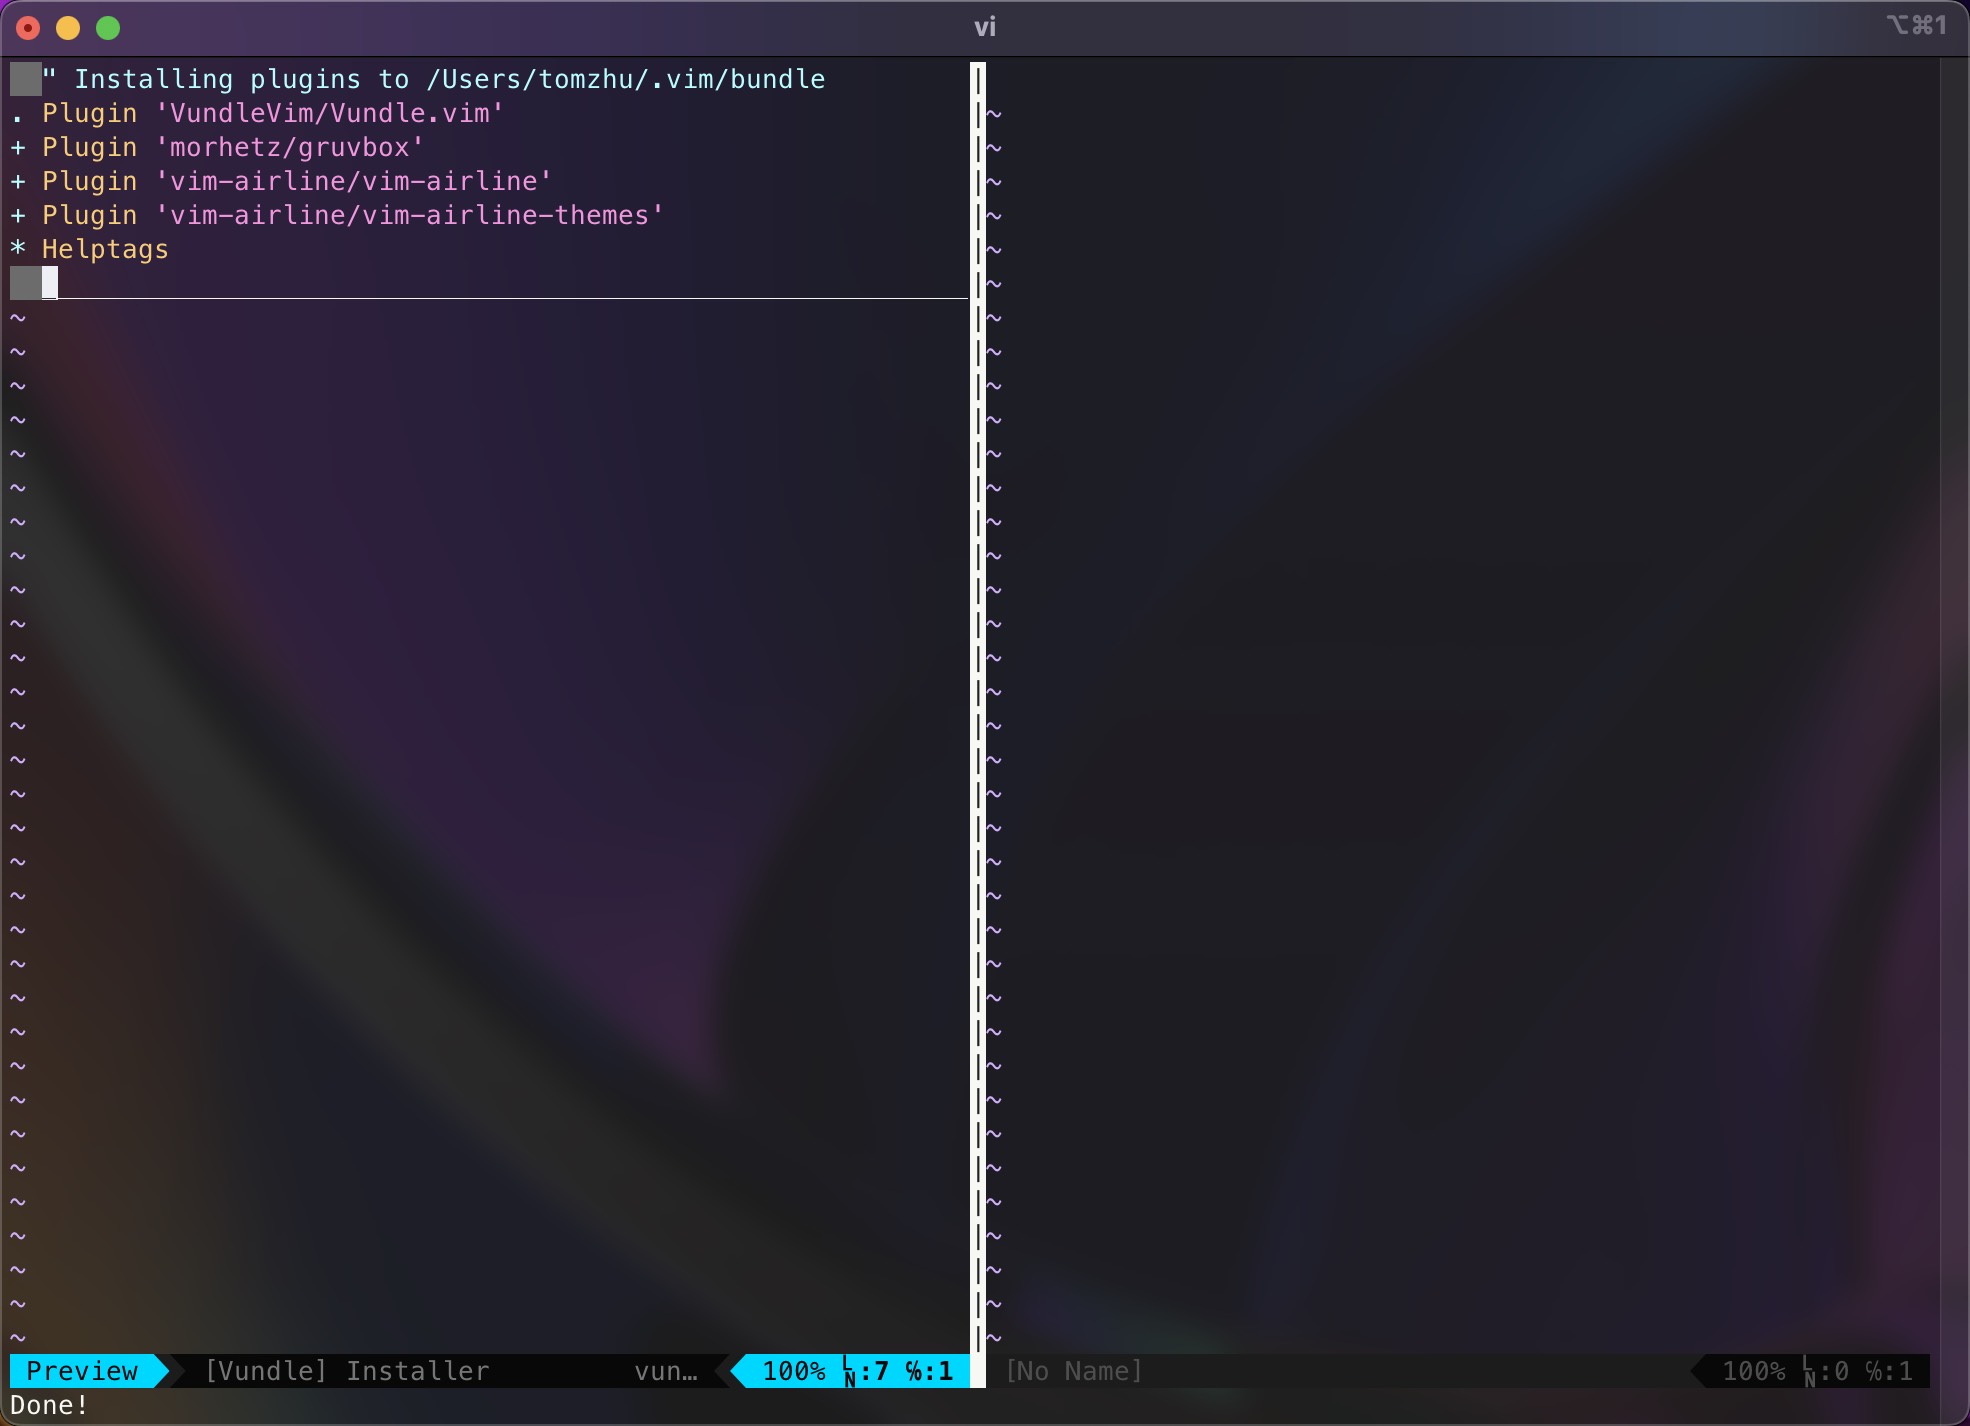
Finally, let’s open Vim. It will throw an error because our color scheme hasn’t been installed as a plugin yet. We can simply press Enter to enter Vim, then run the :PluginInstall command to install the plugins. After exiting Vim and reopening it, everything should work fine.
Customizing Zsh
Oh My Zsh is a popular Zsh configuration management tool. We need to run the following command in the terminal to install it:
1 | |
Oh My Zsh supports numerous plugins and themes. Some of my favorite plugins are:
- git (shortcut Git commands)
- vi-mode (Vim emulator)
- z (quick jump to frequently used directories)
- autoupdate-zsh-plugin (auto-update plugins and themes)
- Fast Syntax Highlighting (syntax highlighting)
- zsh-autosuggestions (auto-suggestions)
- zsh-history-substring-search (history search)
We need to run the following commands in the terminal to download them:
1 | |
As for the theme, I prefer Powerlevel10k. We need to run the following command in the terminal to download it:
1 | |
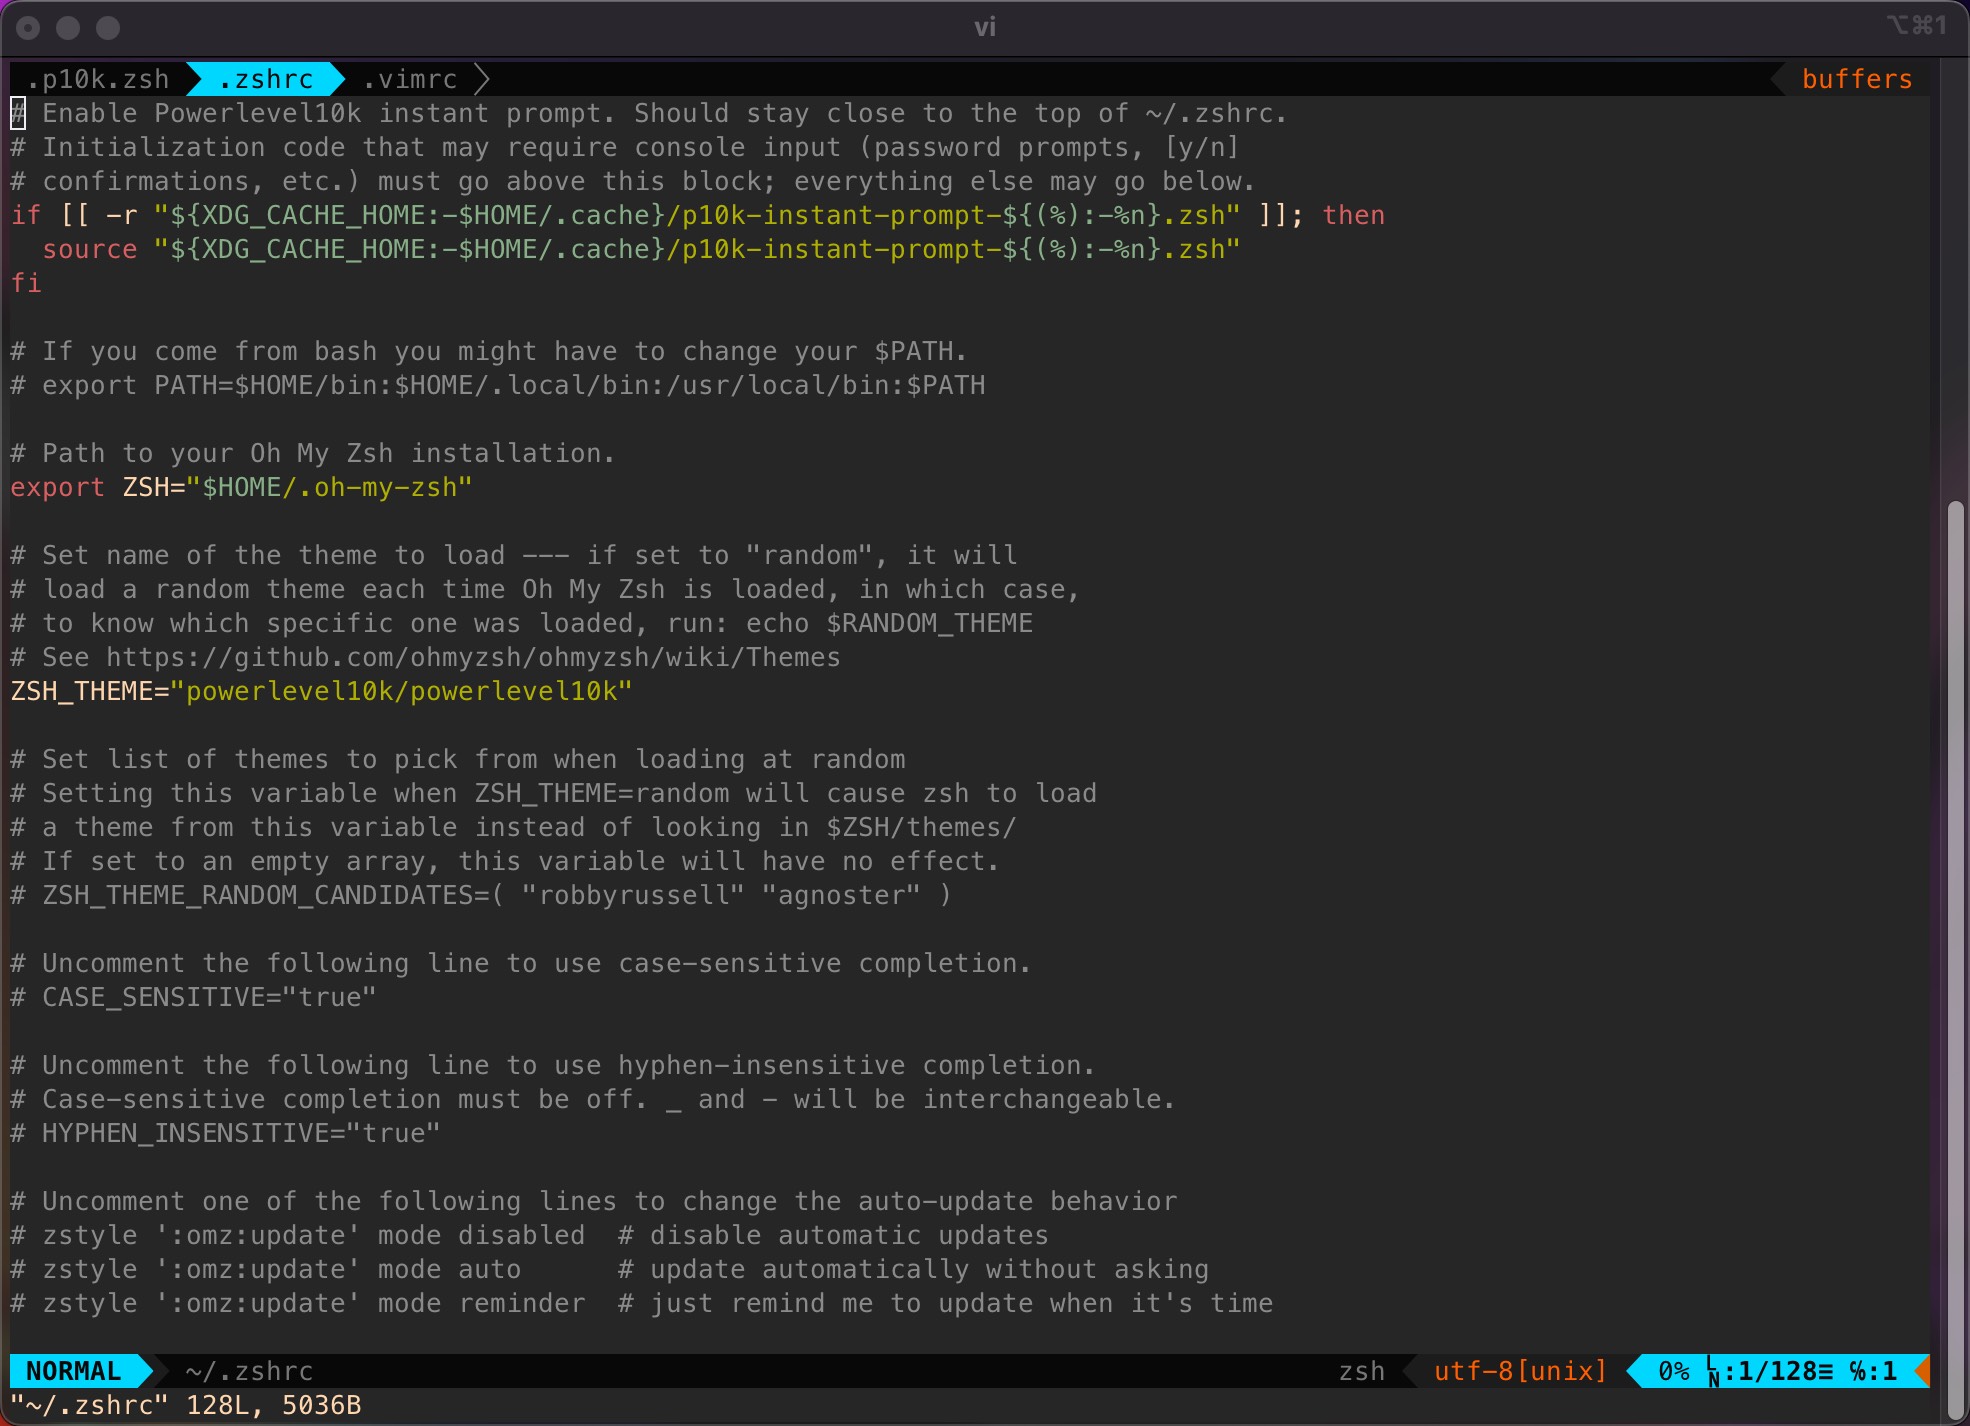
Next, we need to edit the ~/.zshrc file to enable Powerlevel10k:
1 | |
1 | |
After closing the current iTerm2 window or tab and reopening it, you will automatically enter the Powerlevel10k configuration process.
1 | |
You can choose different styles according to your preferences, or you can refer to my configuration.
1 | |
After the configuration process is complete, Powerlevel10k will automatically update the ~/.zshrc file. We need to edit the ~/.zshrc file again to enable various plugins:
1 | |
Here, I have set up some of my commonly used aliases, as well as bindkeys that work with iTerm2’s key mappings and the zsh-history-substring-search plugin. You can modify these according to your needs, but please keep these bindkeys.
Finally, we need to edit the ~/.p10k.zsh file to fine-tune the colors of Powerlevel10k:
1 | |
1 | |
Here, I mainly modified the status bar colors for vi-mode to make it more noticeable. You can also modify it according to your preferences.
The last line’s FOREGROUND needs to be changed to BACKGROUND, so please double-check.
Common Issues
If you also use terminal in IDEs, you may encounter some font display issues. Here, we use Visual Studio Code as an example. We need to press ⌘ Command + , to open the settings, search for terminal.integrated.fontFamily, and modify the font to MesloLGS NF.
Common Usage Tips
Here are some commonly used features and shortcuts.
⌃ Control + A/⌘ Command + ←Move to the beginning of the line⌃ Control + E/⌘ Command + →Move to the end of the line⌥ Option + ←Move one word to the left⌥ Option + →Move one word to the right⌃ Control + U/⌘ Command + ⌫ BackspaceDelete the entire line⌃ Control + W/⌥ Option + ⌫ BackspaceDelete one word⌃ Control + LClear the screen
The zsh-autosuggestions plugin will search the history in real-time as you type and display gray suggestions. You can use → / ⌃ Control + E / ⌘ Command + → to accept the suggestion, or use ⌥ Option + → to accept one word.
The zsh-history-substring-search plugin allows you to search through your history. You just need to type part of a command, then use ⌃ Control + P / ⌃ Control + N to search for the previous or next match.
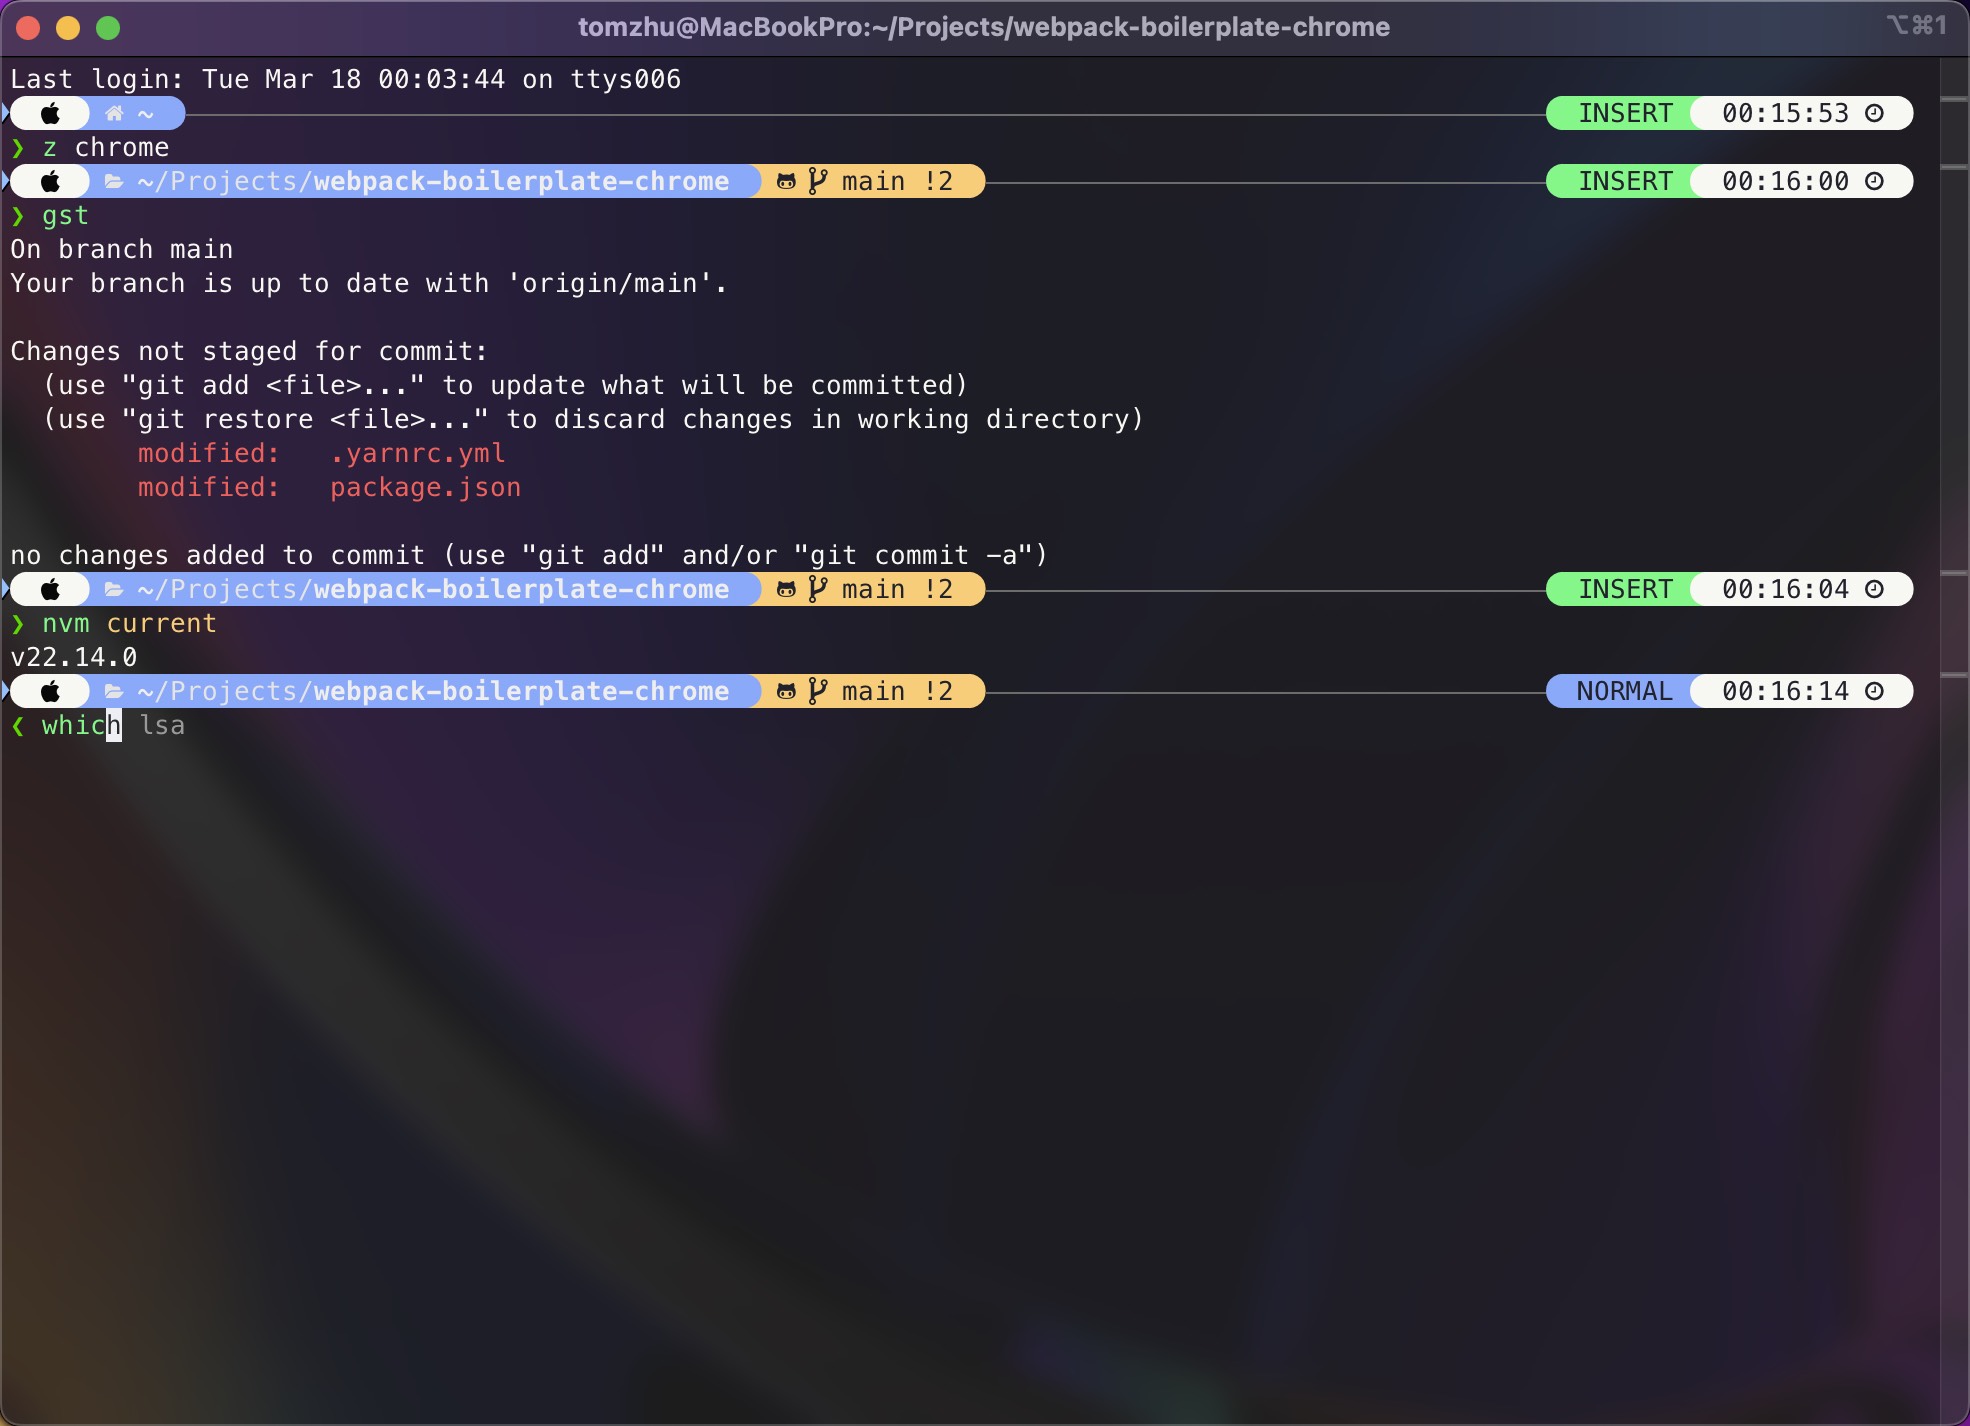
The git plugin simplifies Git commands, for example:
1 | |
The z plugin records the directories you frequently visit. You can use z [directory path keyword] to quickly jump to the target directory, saving time compared to using the cd command to type the full path.
The autoupdate-zsh-plugin plugin will automatically update plugins and themes. You can also use the upgrade_oh_my_zsh_custom command to manually update them.